hello everyone!
this blog has moved to a new one, makeupandmasonjars.blogspot.com. I will be posting there from now on. Thank you!
"No Amount Of Make-up Can Mask An Ugly Heart " - Kevyn Aucoin
Monday, November 5, 2012
Tuesday, June 26, 2012
Some Summer Tips 'n Tricks
My makeup routine is definitely different in the summer than in the winter, and yours should be too! Summer means heat, meaning sweat, meaning your makeup routine should adjust accordingly. Here are a few tips and tricks to beat the heat.
Face
1) Skip the foundation.
I rarely slap on a full face of foundation on a hot summer day, unless I'm majorly breaking out. Instead I reach for primer, a tinted moisturizer, and concealer. I love Smashbox Photofinish Light primer. It's for oily skin and doesn't add a layer of silicone over my face like most primers do. I've been loving mark. tinted moisturizer as well. When I use tinted moisturizer, I skip my regular moisturizer because otherwise I'd just be an oily mess.
You can also still use your foundation, but just use it like a concealer and spot it on where necessary. I also always use a mattifying powder, like Maybelline's Dream Matte powder. I've been using it for years and it's great.
2) Bronzer.
A lot of people think that just because they have a tan means they shouldn't use bronzer. False!! Bronzer is a fantastic way to amp up your look and give a beautiful glow. I've recently been using my NYX When a Leopard Gets a Tan bronzer with my kabuki brush and giving my face a light dusting. You can also use matte bronzers (my favorite being Benefit's Hoola bronzer, but a great cheap alternative is NYC Sunny bronzer) to contour your face.
3) Highlight.
Highlighting powders and creams can cost a lot, but using a champagne eyeshadow can work wonders as well. Recently I've been using a CoverGirl eyeshadow single in Champagne. It's great because I can dab a bit in the inner corners of my eyes to make them stand out, but I also use it on my cheek bones to give my face a glow.
Highlighting can be tricky, because you don't want to use anything too sparkly. Some people don't mind it, but I hate sparkly. Instead opt for shimmer or sheen, which is finer and won't look like chunks of sparkles on your face.
This simple, and often over-looked, step can be just the thing for the sun-kissed glowy look the summer is perfect for.
Eyes
1) Waterproof mascara.
The last thing you want is to get all sweaty and have raccoon eyes. Opt for a waterproof mascara to keep it put all day long. If you can't find a waterproof mascara that you like (often waterproof formulas are different than regular formulas), just use your regular mascara and put a THIN coat of waterproof over your regular.
2) Long-wearing creams are your best friend.
I've been reaching for long-wearing cream eyeshadows a lot this summer. They're so easy to just swipe on and go and not have to worry about primer and all of that. I ADORE Urban Decay's 24/7 Eyeshadow Pencil in Sin. Its the perfect pick-me-up for all over the eyes- the lid, brow, and inner corners. And it stays all day! Definitely worth the money.
A more affordable option are the Maybelline Color Tattoos. Just make sure to apply it in a thin layer, otherwise it may crease during the day.
3) White/flesh-toned eyeliner on the waterline.
This makes you look awake and refreshed without much effort and it's not too noticeable. Woot!
Lips
1) Use lipstick like a stain.
Bold lips are definitely in, but using a vibrant lipstick can be hard upkeep. Summer is great for sheer color, so try dabbing your lipstick on with your finger. This will give a more stained, yet noticeable effect, without as much maintenance.
2) Skip the stick; use gloss.
I'm honestly not much of a lipgloss girl, but this summer I've been loving how easy glosses are. I've been using my lipgloss from theBalm in Tutti my Fruitti almost every day.
Hope this helps!! Thanks for viewing!
~Beth
Tuesday, June 5, 2012
Soft Date Look
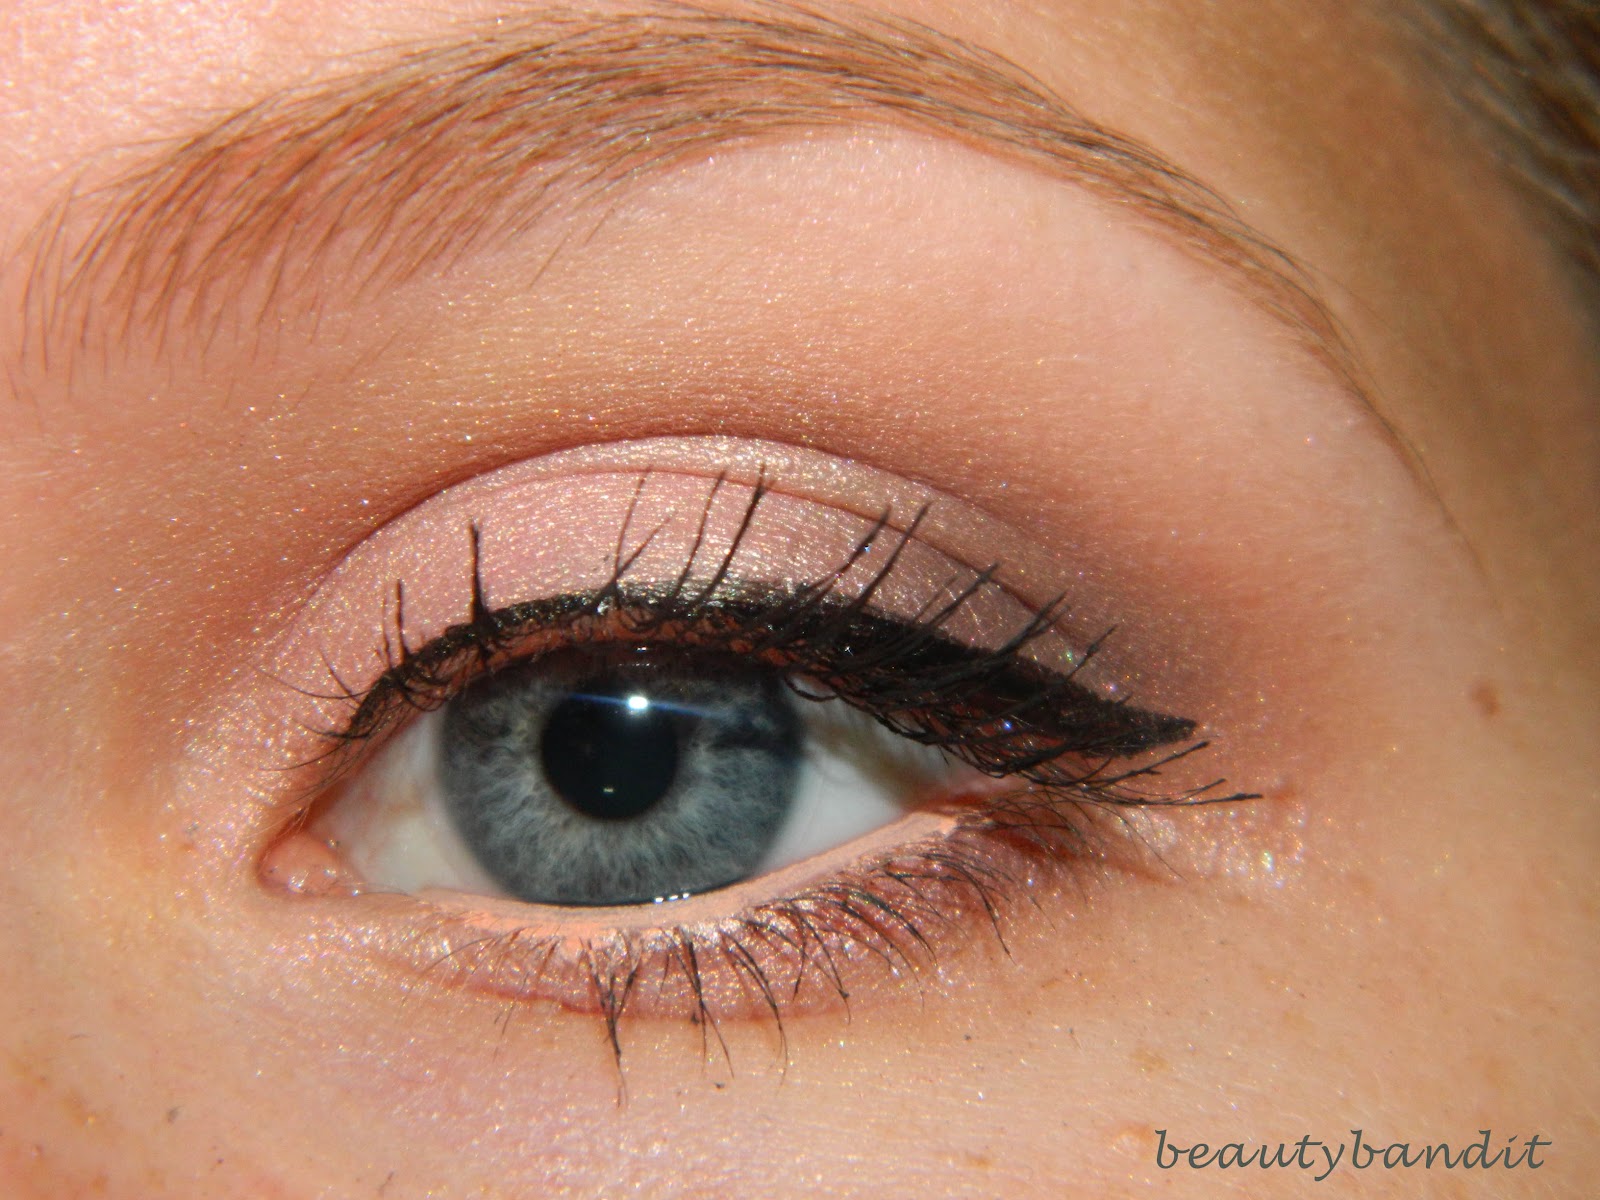
I've really been loving playing around with peachy colors this summer. I was doing so when I came up with this eye look, which I think would be perfect for a date or other event where you want to look a little more dressed up than usual, but not over the top for an event like prom or something of that nature.

The key to this look is to blend, blend blend!
1) Start off with a clean, primed eye.
2) Take a light, peachy-pink color and pack this onto the lid.
3) Take a darker peach color and apply this on the outer corner of your upper and lower lid and into your crease.
4) Using a fluffy brush, take a shadow that is just slightly darker than your skin color. Blend this into the crease with the peachy color.
5) Take a deep purple shadow. Using a pencil brush, apply this to the very outer edges of your lid and very lightly to your outer lower lash line. Again, take your fluffy brush and blend this out.
6) Use a white or flesh-toned eyeliner on your waterline. Using a black liquid liner, line your upper lash line. Create a slight wing at the end if you so choose.
7) Curl your lashes and apply mascara, and you're done!
Thanks for viewing!
~Beth
Summer Colored French Tips
Again, I am just in love with the Essie Summer Collection, and can't choose just one color to wear. I saw a manicure like this on pinterest a while back, and decided to try it myself. I haven't had the best of luck with doing french manicures on myself, but I decided to try it again. This time I think it turned out pretty good! I think the trick is to let the base color dry absolutely completely before applying the tip guides (like for a couple of hours). Enjoy!

As a base I again used Revlon's Colorstay in Bare Bones. This manicure is the same color scheme as the last toothpick manicure I did. For some reason I'm diggin' it.
Then, after letting the base to dry for about 3-4 hours, I applied french manicure tip guides. These are pretty cheap at the drug store, but you can also use tape if you don't have any.
From there on out, it's pretty self-explanatory. Apply the color at the tip of the nail. I suggest applying it from the tip guide on out to the edge of the nail. I did two coats of each tip before removing the guide, but remove the guide as quickly as possible after the second coat (this will help eliminate the guide taking the polish with it).


From left to right: Essie Fear or Desire, Essie Bikini So Teeny, Essie Off The Shoulder, Essie Mojito Madness, Zoya Pippa
Thanks for viewing!
~Beth
Monday, June 4, 2012
Toothpick Splatter Nails
So I recently got this cute little set of four mini Essie nail polishes from their summer collection, and I just couldn't decide which color I wanted to wear. So I ended up using the toothpick technique to create a splatter-like pattern on my nails using all four of the colors. I really like how this turned out, but I think the pictures don't do the effect justice. Enjoy!

First I painted my nails with a sand color (LOVE this color- Revlon Colorstay in Bare Bones). I used a sand color to stick with the summer-beachy theme of the summer collection from Essie. But you can use whatever base you'd like.
From there I just put a dot of polish on a palette, took a toothpick, and swiped the color from the corner of my nail outwards. Then I just repeated the steps with each of the colors.
From bottom of the nail to top I used Bikini So Teeny, Mojito Madness, Fear or Desire, and Off the Shoulder. I topped it off with NYC Matte Me Crazy matte topcoat.
 |
| Before the matte topcoat |
 |
| With matte topcoat |
Thanks for viewing!
~Beth
Wednesday, May 23, 2012
Bronze Summer
I love bronze looks in the summertime. Here is just one variation of the classic look. Enjoy!

First, to prime my eyes and have a bronze base, I used Maybelline Color Tattoo in Bad to the Bronze.

Next I wet a brush and used a golden e.l.f. pigment all over the lid.

I used this Physician's Formula palette (the bronzed blue eyes one) a lot for this look. I used the light champagne color as a highlight and on the very ball (highest roundest point) on my lid.

Using a fluffy blending brush, I mixed a couple of light pinky-purple colors (this is the coastal scents 88 palette) and placed this in the crease. Using a fluffy brush makes the color go on a lot more sheer. I really like this step, because it makes your eyes kind of look like a sunset.

Using a pencil brush, I used the bronze color on the outer corners of my eyes and along the lower lash line.

I then lined my waterline with a white pencil. I lined my upper lid with a wet eyeliner brush and used the darkest brown color in the Physician's Formula palette. I then curled my lashes and applied a black mascara.

For lips I used Sonia Kashuk lipstick in Sheer Bronzey Nude and topped it off with mark. Gloss On Lipgloss in Sand.

For the rest of the face I skipped foundation and just used concealer. For this look make sure to use a bronzer and highlighter to bring out a sun-kissed glow!
Hope you liked this! Thanks for viewing!
~Beth
Monday, May 21, 2012
Aaaand the winner is...
Hi everyone!
First I'd like to apologize for my lack of activity on here. It was just finals at school and I had to pack and move and unpack and all of that jazz. I should be having some fun stuff up soon!
Second, I have the winner of the giveaway. This was a random selection giveaway, not a contest (just to be clear). Thank you everyone for your input- it means a lot! The winner of the giveaway is fancyfashionss! If you could get back to me with your name and address via e-mail then I can mail you your prize :) Thanks again everyone!
Subscribe to:
Posts (Atom)